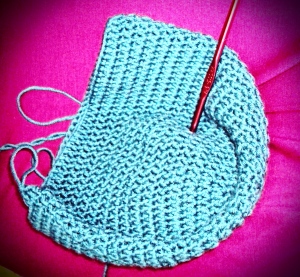
Men are notoriously hard to craft for, but damn it all if I don’t get the warm fuzzies whipping up something toasty for my man.
This pattern is for the kind of solid, fitted beanie popular with foxy snowboarders, college kids, and boyfriends. This is a great portable project, easy to remember and you only have one ball of yarn to truck around.
Yarn is 2 balls of Debbie Bliss Rialto Dk in 23020, a slate blue, 100% Merino extrafine superwash. Hook is an H/5.00 mm. Nice and warm, but still fits under a helmet.
Begin using the “Magic Loop Method.” Click the link for a quick tutorial. This cast-on was new to me, but easy to learn and wonderful for hats, small toys, or any project where you want an invisible start rather than a hole.
Abbreviations: DC = double crochet, sl st = slip stitch, DCtog = Double crochet together. To DCtog: *Yarn over, insert hook in next stitch, yarn over, draw yarn through stitch, yarn over, draw yarn through 2 loops on hook* twice, yarn over, draw yarn through 3 loops on hook.
Round 1: Chain 3 (acts as first double crochet), 9 DC into magic loop. Sl st into top of first chain. You now have ten DC in magic loop. Pull loop taut, and be in awe of how the hole disappears!
Round 2: Chain 2 (see note at bottom), 2 DC into every stitch all the way around. End with sl st into first chain (20 DC).
Round 3: Chain 2. *1 DC in next stitch, 2 DC in following stitch* all the way around. End with sl st into first chain (30 DC).
Round 4: Chain 2. *1 DC in next two stitches, 2 DC in following stitch* all the way around. End with sl st into first chain (40 DC).
Round 5: Chain 2. *1 DC in next three stitches, 2 DC in following stitch* all the way around. End with sl st into first chain (50 DC).
Round 6: Chain 2. *1 DC in next four stitches, 2 DC in following stitch* all the way around. End with sl st into first chain (60 DC).
Round 7: Chain 2. *1 DC in next five stitches, 2 DC in following stitch* all the way around. End with sl st into first chain (70 DC).
Round 8: Chain 2. *1 DC in next six stitches, 2 DC in following stitch* all the way around. End with sl st into first chain (80 DC).
Round 9 and continuing: Work even until hat is desired length. For me, this was 23 rows total.
Optional: Folded Brim
Round 24 (or whatever. Folded brim will be flipped up, so begin these instructions after working to your desired final length.): Chain 2. *1 DC in front loop only of next 12 stitches. DCtog* all the way around. End with slip stitch into first chain (75 DC).
Round 25-28: 1 DC in each stitch all the way around. Fasten off.
The brim should turn up naturally with the front-loop-only row.
* Chaining only 2 stitches at the beginning of each round makes for a smaller, neater seam. If you’re used to chaining 3 stitches, it takes a bit of getting used to but it looks much nicer.


